When something goes wrong at work, the last thing anyone wants to deal with is a confusing incident report form. Yet most organizations rely on clunky, outdated forms that discourage reporting and miss critical details. The result? Incidents go unreported, patterns stay hidden, and preventable problems keep happening.
A well-designed incident report form does the opposite. It makes reporting quick and straightforward, captures the right information, and helps you spot trends before they become bigger issues. Whether you’re handling workplace injuries, security breaches, or equipment failures, the right form can transform how your organization manages incidents.
Here’s how to create an incident report form that people will actually use.
What makes an incident report form effective
Before diving into the step-by-step process, let’s establish what separates a good incident report form from a bad one.
Good forms are specific to your context. A construction site needs different fields than a software company. Generic templates rarely capture what matters most to your organization.
Good forms are mobile-friendly. Incidents happen everywhere, and people need to report them immediately. If your form doesn’t work on phones, you’ll lose reports.
Good forms guide the reporter. Clear instructions, logical flow, and helpful prompts ensure you get complete, accurate information every time.
Good forms respect people’s time. Every field should serve a purpose. If you can’t explain why you need a piece of information, don’t ask for it.
Step 1: define your incident types and scope
Start by listing the types of incidents your form needs to handle. This determines your entire structure.
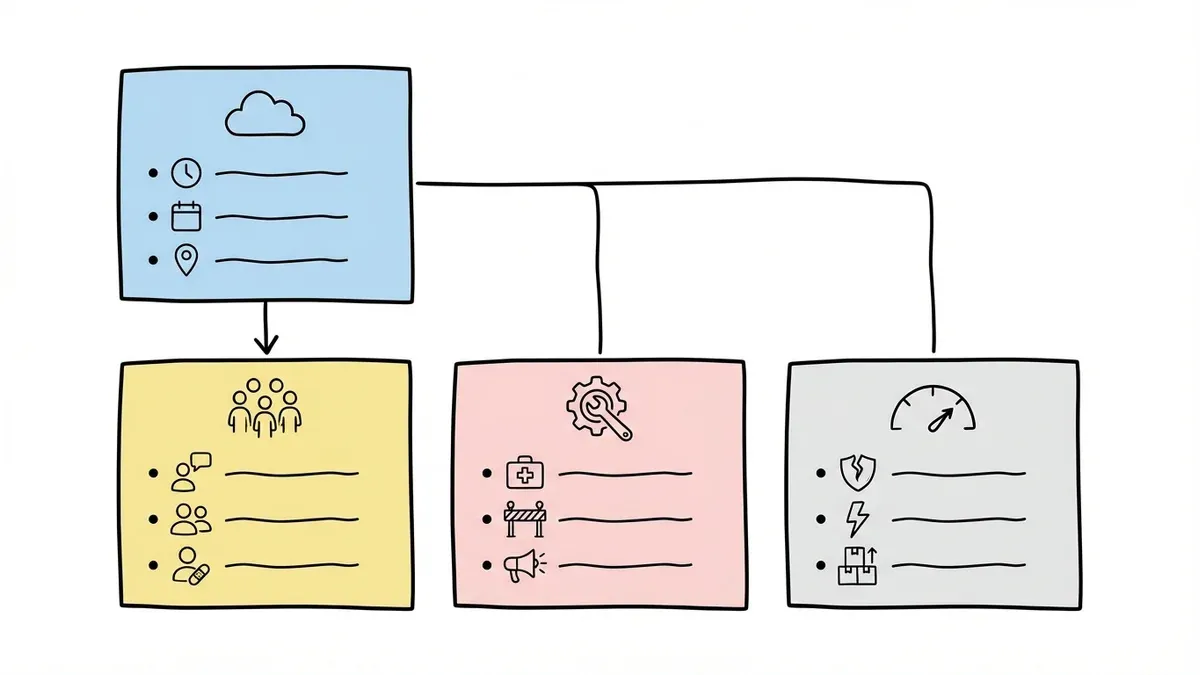
Common incident categories include:
- Safety incidents: Injuries, near misses, unsafe conditions
- Security incidents: Data breaches, unauthorized access, theft
- Operational incidents: Equipment failures, process breakdowns, service disruptions
- Environmental incidents: Spills, emissions, waste issues
- HR incidents: Harassment, discrimination, policy violations
Most organizations need one form rather than separate forms for each type. A single incident report form with smart field organization works better than juggling multiple forms.
Pro tip: Interview the people who will use your form. Ask them about the most common incidents they see and what information helps them respond effectively.
Step 2: map out your essential fields
Every incident report form needs certain core information, regardless of your industry:
Basic incident details
- Date and time of incident
- Location (be specific — “Building A, 2nd floor, near the elevator”)
- Brief description of what happened
- Incident type/category
People involved
- Reporter name and contact information
- Injured parties (if applicable)
- Witnesses
- Supervisor or manager notified
Immediate actions taken
- First aid provided
- Emergency services called
- Area secured or equipment shut down
- Who was notified and when
Severity assessment
This helps prioritize response. Use a simple scale:
- Minor: No injury or minimal impact
- Moderate: Minor injury or moderate impact on operations
- Major: Serious injury or significant operational disruption
- Critical: Life-threatening injury or severe operational impact
Don’t overcomplicate this. Four levels are enough.
Step 3: add industry-specific fields
Now customize your incident report form for your specific context. Here are common additions by industry:
Healthcare facilities:
- Patient identification (if involved)
- Medical equipment involved
- Medication errors (type, dosage, timing)
- Infection control measures taken
Manufacturing and construction:
- Equipment or machinery involved
- Safety equipment in use
- Weather conditions (for outdoor incidents)
- Work permit status
Retail and hospitality:
- Customer involvement
- Property damage assessment
- Security footage available
- Insurance notification required
IT and software companies:
- Systems affected
- Data involved
- Downtime duration
- Recovery steps initiated
Keep industry-specific fields focused. It’s tempting to add “just in case” fields, but they make forms longer without adding value.
Step 4: design for mobile and accessibility
Most incident reports happen away from desks. Your form must work perfectly on phones and tablets.
Mobile design essentials:
- Single-column layout
- Large touch targets (buttons and form fields)
- Minimal typing required
- Auto-save functionality
- Offline capability when possible
Accessibility considerations:
- Clear, high-contrast text
- Logical tab order for keyboard navigation
- Screen reader compatibility
- Simple language (aim for 8th-grade reading level)
Test your form on actual mobile devices, not just browser developer tools. The experience is different when you’re trying to report an incident under stress.
Step 5: write clear instructions and field labels
The best incident report form is useless if people don’t understand what you’re asking for. Every field needs clear, specific labels.
Instead of: “Description” Write: “Describe what happened in 2-3 sentences”
Instead of: “Location” Write: “Exact location (building, floor, room number, or GPS coordinates)”
Instead of: “Severity” Write: “How serious was this incident? (Select the best match)”
Add help text for complex fields. For example, if you’re asking about “root cause,” explain that you want the underlying reason, not just what immediately happened.
Use placeholder text to show examples:
- Date field: “MM/DD/YYYY”
- Time field: “2:30 PM” or “14:30”
- Location field: “Building C, 3rd floor, Conference Room 301”
Step 6: build in data validation and error prevention
Nothing kills form completion like validation errors that appear after someone hits submit. Build smart validation that helps people get it right the first time.
Essential validation rules:
- Required fields clearly marked
- Date formats consistent
- Email addresses properly formatted
- Phone numbers in expected format
- File uploads within size limits
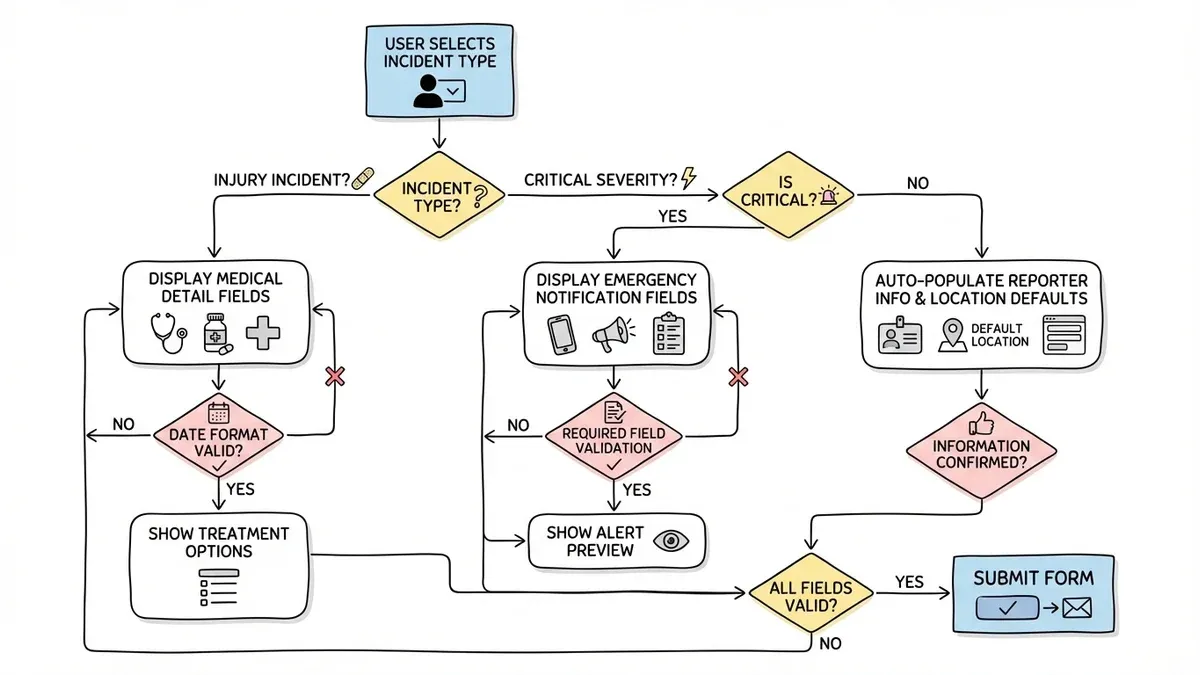
Smart defaults:
- Current date and time pre-filled
- Reporter’s information auto-populated if they’re logged in
- Location defaulted to most common areas (with option to change)
Progressive disclosure: Show additional fields only when relevant. If someone selects “injury” as the incident type, then show fields for medical details. This keeps the form short for simple incidents while capturing necessary details for complex ones.
Step 7: plan your workflow and notifications
Your incident report form is just the beginning. Plan what happens after someone submits it.
Immediate notifications:
- Confirmation email to the reporter
- Alert to the appropriate manager or safety officer
- Emergency notifications for critical incidents
Follow-up workflow:
- Assignment to investigation team
- Status updates to stakeholders
- Reminder emails for incomplete investigations
- Final report distribution
Data management:
- Where will reports be stored?
- Who has access to what information?
- How long will you retain records?
- What reports will you generate?
Many online form builders integrate with popular tools like Slack, Microsoft Teams, or email systems to automate these workflows.
Step 8: test with real users
Before rolling out your incident report form, test it with the people who will actually use it. This catches problems you’ll never spot from behind a desk.
Testing scenarios:
- Have someone report a mock incident on their phone while walking around your facility
- Test with employees who aren’t tech-savvy
- Try completing the form under time pressure
- Test accessibility features with actual users who need them
Common issues testing reveals:
- Fields that seem obvious to you but confuse others
- Mobile layout problems
- Validation errors that frustrate users
- Missing incident types or categories
- Workflow bottlenecks
Iterate based on feedback. The goal is a form that people can complete quickly and accurately, even when they’re stressed or distracted.
Common mistakes to avoid
Making the form too long: Every additional field reduces completion rates. If you can’t justify why you need information, don’t ask for it.
Using legal or technical jargon: Write for the people who will use the form, not lawyers or safety professionals. “Unsafe condition” is clearer than “hazardous environmental factor.”
Requiring perfect information: People report incidents immediately after they happen. They might not know all the details yet. Allow for “unknown” or “to be determined” options.
Ignoring mobile users: Forms that don’t work on phones don’t get used. Period.
Forgetting about follow-up: The form is just step one. If people never hear back about their reports, they’ll stop reporting.
One-size-fits-all mentality: A form designed for office incidents won’t work for construction sites. Customize for your environment.
Making your incident report form work long-term
Creating the form is just the beginning. Here’s how to keep it working:
Regular review and updates: Set a quarterly review to assess what’s working and what isn’t. Are you getting the information you need? Are completion rates dropping?
Training and communication: Make sure everyone knows the form exists, when to use it, and how to access it. Include it in new employee orientation and safety training.
Feedback loop: Ask users what would make the form better. The people using it daily will spot improvement opportunities you miss.
Data analysis: Look for patterns in your incident data. If you’re not seeing trends that help prevent future incidents, your form might not be capturing the right information.
The best incident report form is one that evolves with your organization’s needs while staying simple and user-friendly.
Ready to build your incident report form?
Creating an effective incident report form doesn’t require expensive software or technical expertise. With the right approach and tools, you can build a form that encourages reporting and captures the information you need to keep your workplace safe.
We built Fomr specifically for situations like this — where you need a professional form quickly, without the complexity of traditional form builders. You can start building your incident report form right now without even creating an account. Try our guest editor and see how easy it is to create forms that actually work.