Every gym, climbing wall, kayak rental, and bounce house operator knows the drill. Before anyone participates, they sign a waiver. The problem is that paper waivers are terrible at their job. They get coffee-stained, shoved into filing cabinets, and lost during office moves. When you actually need one, good luck finding it.
A liability waiver form online fixes most of these problems. Digital waivers are searchable, timestamped, stored automatically, and accessible from anywhere. Participants can sign on their phone before they even show up. And if a dispute arises six months later, you’re not digging through a cardboard box to find the right piece of paper.
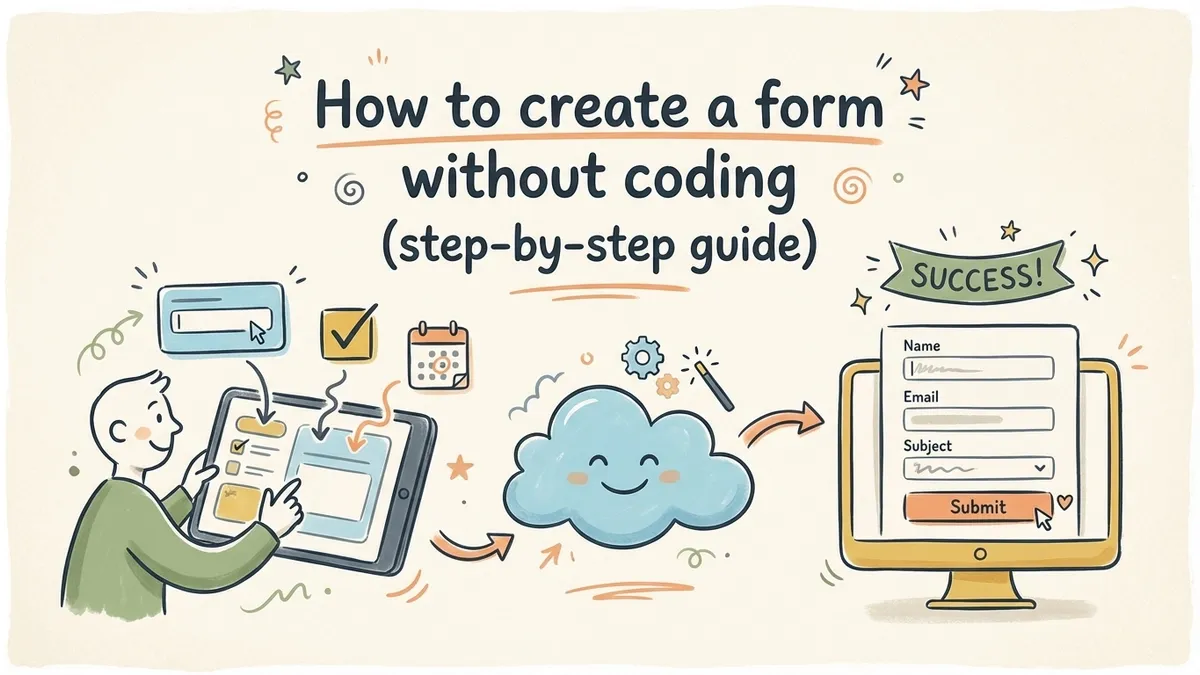
This guide walks through how to build a digital waiver form that covers the right bases, looks professional, and gets signed without friction.
Important disclaimer: This article is for informational purposes only. It is not legal advice. Liability waivers have real legal consequences, and the enforceability of any waiver depends on your jurisdiction, your specific activity, and how the waiver is written. Always consult a qualified attorney before using a waiver form in your business.
Who needs a liability waiver form
Waivers aren’t just for extreme sports. Any business or organization where participants face physical risk, property damage, or potential injury should consider one. That includes:
- Gyms, fitness studios, and personal trainers
- Adventure and outdoor recreation (zip lines, rock climbing, white water rafting)
- Event organizers (5K runs, obstacle courses, festivals)
- Contractors and tradespeople working on client property
- Rental businesses (equipment, vehicles, boats)
- Youth programs, camps, and field trips
- Spas, salons, and wellness practitioners offering new treatments
The common thread is risk. If someone could get hurt, damage property, or have an adverse reaction during your activity, a release of liability form online gives you a documented record that they understood and accepted those risks before participating.
What makes a waiver legally valid
Not every piece of paper (or web form) with “I agree” at the bottom holds up in court. Enforceability varies by state and country, but courts generally look for a few things when deciding whether a waiver is valid.
Clear and specific language
Vague waivers get thrown out. The document needs to clearly state what risks the participant is accepting and what rights they’re giving up. “I waive all claims” is too broad. “I acknowledge that rock climbing involves risk of falls, equipment failure, and physical injury, and I voluntarily assume these risks” is specific enough for a court to take seriously.
Plain language matters here. A waiver written entirely in dense legalese may actually work against you, because a court could argue the signer didn’t truly understand what they agreed to. The American Bar Association has noted that clarity and conspicuousness are key factors in enforceability.
Voluntary and informed consent
The person signing must do so voluntarily and with a reasonable understanding of what they’re agreeing to. This means no hiding the waiver in fine print, no pressuring someone to sign on the spot without reading it, and no burying critical terms deep in a wall of text.
Sending a digital waiver form ahead of time actually helps here. When someone fills it out at home the night before their kayak trip, it’s harder to argue they were rushed or pressured.
Proper identification
The waiver needs to clearly identify who is signing, what activity or service it covers, and who is being released from liability (your business, its employees, its contractors, etc.). For minors, a parent or legal guardian must sign.
Consideration
In contract law, “consideration” means both parties get something. The participant gets to do the activity; your business gets protection from certain claims. This is usually straightforward, but the waiver should reference the activity or service being provided.
Not unconscionable
Courts can void waivers that are grossly unfair. A waiver that tries to release you from liability for intentional harm or gross negligence will almost certainly fail. Stick to inherent risks of the activity, not blanket immunity for everything.
Essential fields for your online waiver form
With the legal framework in mind, here’s what your digital waiver form should actually include. Think of these as building blocks, not a rigid template. Your attorney should review the final version.
Participant information — Full legal name, date of birth, email address, phone number. You need enough to identify the signer and contact them if needed.
Emergency contact — Name, phone number, and relationship. This is standard for any activity involving physical risk, and participants expect it.
Activity or service description — A clear statement of what the participant is signing up for. “Indoor rock climbing session at Summit Gym” is better than “recreational activities.”
Risk acknowledgment — A section listing the specific risks associated with the activity. Be thorough but honest. Don’t try to list every conceivable scenario, but cover the realistic ones.
Waiver and release language — The actual legal text where the participant agrees to release your business from liability for the stated risks. This is the section your attorney should write or review.
Medical disclosure (optional but recommended) — A question about relevant medical conditions, allergies, or physical limitations. This protects both parties. If you’re collecting health information, make sure your form platform handles data securely. Look for HTTPS encryption and SOC 2 compliance at minimum.
Parent/guardian signature for minors — If your activity involves anyone under 18, you need a separate section for a parent or legal guardian to sign on their behalf. Some jurisdictions have specific rules about minor waivers, so check with your attorney.
Electronic signature and date — A clear “I agree” checkbox or signature field, paired with an automatic timestamp. Electronic signatures carry legal weight under the ESIGN Act in the United States and similar legislation in other countries.
Designing a waiver form people will actually complete
A waiver that nobody finishes signing is worse than no waiver at all. You think you’re covered, but you’re not. Design matters.
Keep it scannable
Long blocks of legal text are unavoidable in a waiver, but you can make them easier to digest. Break the document into clearly labeled sections. Use headings like “Risks of Participation” and “Release of Liability” so people can follow the structure. Bold the most critical sentences.
Don’t go overboard with formatting, though. A waiver plastered with bold text, colored highlights, and all-caps warnings looks panicky and unprofessional.
Use multi-page layouts
Cramming everything onto a single scrolling page makes the form feel overwhelming. Splitting your waiver into multiple pages (participant info on page one, risk acknowledgment on page two, signature on page three) gives people a sense of progress and keeps each screen focused.
Multi-page forms also tend to have higher completion rates. When someone sees “Step 1 of 3” instead of a mile-long scroll, they’re more likely to keep going. We wrote about this in detail in our guide on what multi-step forms are and why they work.
Make it mobile-friendly
A lot of your participants will sign on their phones. Maybe they’re in the parking lot before a class, or filling it out on the couch the night before. Your waiver form needs to work perfectly on small screens. That means large tap targets, readable font sizes, and no horizontal scrolling.
If you’re building your form with Fomr, every form is mobile-responsive by default. The drag-and-drop editor lets you preview exactly how the form looks on different screen sizes before you publish.
Brand it
A waiver form that looks like a generic template doesn’t inspire confidence. Add your logo, use your brand colors, and match the typography to your website. People are more willing to sign something that looks like it came from a real, established business.
This is especially true for higher-risk activities. If someone is about to go skydiving, a polished, branded waiver form signals professionalism. A plain white form with Times New Roman signals “we threw this together last week.”
Building your waiver form step by step
Here’s a practical walkthrough for putting your form together using an online form builder.
1. Start with the right tool
Pick a form builder that gives you enough flexibility for a legal document. You need multi-page support, a variety of field types (text inputs, date pickers, checkboxes, long text areas for legal clauses), and the ability to customize the design.
Fomr’s guest editor lets you start building immediately without creating an account, which is handy if you want to prototype your waiver before committing to a platform.
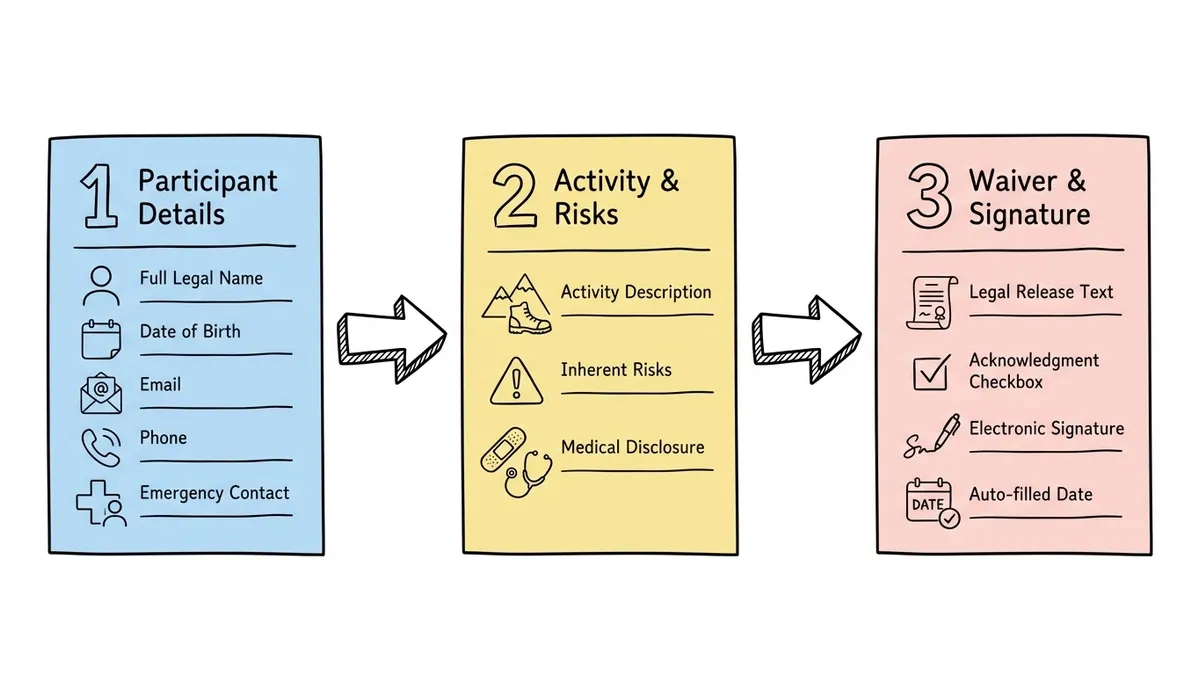
2. Set up your pages
Create separate pages for each logical section:
- Page 1: Participant details — Name, date of birth, email, phone, emergency contact
- Page 2: Activity and risks — Description of the activity, list of inherent risks, any medical disclosure questions
- Page 3: Waiver agreement and signature — The legal release text, acknowledgment checkbox, electronic signature, date
This structure mirrors what participants expect from a waiver. It also makes the form feel manageable rather than intimidating.
3. Write your content
Drop in the legal language your attorney provided. For the non-legal sections (participant info, emergency contact), keep labels simple and direct. “Full legal name” not “Please enter your full legal name as it appears on your government-issued identification.”
Add helper text under complex fields where it helps. A note like “List any medical conditions that may affect your ability to participate safely” under the medical disclosure field gives people clear guidance.
4. Add the signature
Use a checkbox field with text like “I have read and understand this waiver, and I voluntarily agree to its terms.” Pair it with a date field that auto-fills with the current date if your form builder supports it.
Some form builders offer actual signature drawing fields. These look more official, but a checkbox acknowledgment is legally sufficient in most cases. Again, confirm with your attorney.
5. Style and test
Apply your branding. Test the form on your phone, a tablet, and a desktop. Have someone unfamiliar with the waiver complete it and time how long it takes. If it takes more than three or four minutes, look for ways to trim.
How to share your digital waiver form
Building the form is half the job. Getting it in front of participants at the right moment is the other half.
QR codes at your location
Print a QR code and display it at your front desk, check-in area, or entrance. Participants scan it with their phone, fill out the waiver on the spot, and you have a digital record instantly. No clipboards, no pens, no paper jams.
This works especially well for walk-in businesses like gyms, trampoline parks, and rental shops. The QR code can link directly to your waiver form, and the whole process takes a couple of minutes.
Embed on your booking or registration page
If participants book online before showing up, embed the waiver directly on your booking page. This way, the waiver is part of the sign-up flow rather than a separate step they might skip or forget.
We have a detailed guide on how to embed a form on any website if you need help with the technical side. Fomr’s embed widget uses a lightweight JavaScript snippet, not an iframe, so it loads fast and matches your site’s look.
Email a link before the appointment
Send the waiver link in your confirmation email. “Please complete this waiver before your session on Saturday” is clear and gives people time to read it carefully. This approach is great for services like personal training, spa treatments, or guided tours where there’s a booking ahead of time.
Share during event registration
If you’re running an event, include the waiver as part of your event registration form. Participants complete both in one flow, which reduces the chance of someone showing up without a signed waiver.
For consent-heavy events (medical studies, clinical trials, research participation), you might also want to review our guide on building online consent forms, which covers informed consent requirements in more detail.
Common mistakes to avoid
Copying a waiver template verbatim from the internet. Generic templates don’t account for your specific activity, jurisdiction, or business structure. Use templates as a starting point, then have an attorney customize the language.
Forgetting about minors. If anyone under 18 participates in your activity, you need a parent/guardian signature section. In some states, parental waivers for minors have limited enforceability, which makes proper legal review even more important.
Making the form too long. Yes, you need thorough legal language. But you don’t need five paragraphs of preamble before the first field. Get to the point. Every unnecessary sentence increases the chance someone abandons the form.
Not storing responses securely. Waiver data includes personal information, medical details, and legal agreements. Make sure your form platform encrypts data in transit and at rest. Check for SOC 2 compliance and GDPR alignment if you serve international participants.
Skipping the mobile test. If your waiver form breaks on a phone screen, you’ll lose a significant chunk of signers. Test it yourself on an actual phone, not just a browser’s responsive mode.
A note on electronic signatures and legal standing
Electronic waivers are legally recognized in all 50 U.S. states under the ESIGN Act and the Uniform Electronic Transactions Act (UETA). The European Union’s eIDAS regulation provides a similar framework. Canada, Australia, and most other developed countries have equivalent legislation.
That said, enforceability still depends on how the waiver is presented and signed. Courts look at whether the signer had a reasonable opportunity to read the terms, whether the agreement was clearly presented (not hidden behind a generic “I agree to the terms of service” link), and whether the signer’s identity was reasonably verified.
A well-built online waiver form actually provides stronger evidence than a paper one in many cases. You get exact timestamps, IP addresses, and a complete record of what was displayed to the signer. Paper waivers offer none of that.
Start building your waiver form
A liability waiver form online doesn’t need to be complicated to build. It needs to be clear, thorough, and easy to sign. Get the legal language right with your attorney, structure the form so it’s not overwhelming, brand it so it looks professional, and put it where participants will actually see it.
If you want to get started quickly, Fomr’s free plan gives you unlimited forms and responses with full design control. You can build a multi-page waiver, add your branding, generate a QR code, and embed it on your site without paying anything.
Just remember: the form builder handles the technology. The legal substance is between you and your attorney.