The Yes/No component asks a binary question with exactly two answers. The answers always mean yes and no, but you can rename the labels to fit your question — for example “Agree” and “Disagree” or “Sure” and “Not now”.

When to use Yes/No
Section titled “When to use Yes/No”Yes/No is the right component for any question with exactly two possible answers:
- “Have you used our product before?”
- “Would you recommend us to a friend?”
- “Do you want us to follow up with you?”
- “Did this article answer your question?”
Use Yes/No whenever you are asking a question. Two related components cover different jobs:
- Use Checkbox for first-person confirmations and agreements, such as “I agree to the terms and conditions”.
- Use Switch for true on/off settings, such as “Receive email notifications”.
Adding a Yes/No component
Section titled “Adding a Yes/No component”-
Open your form in the editor
-
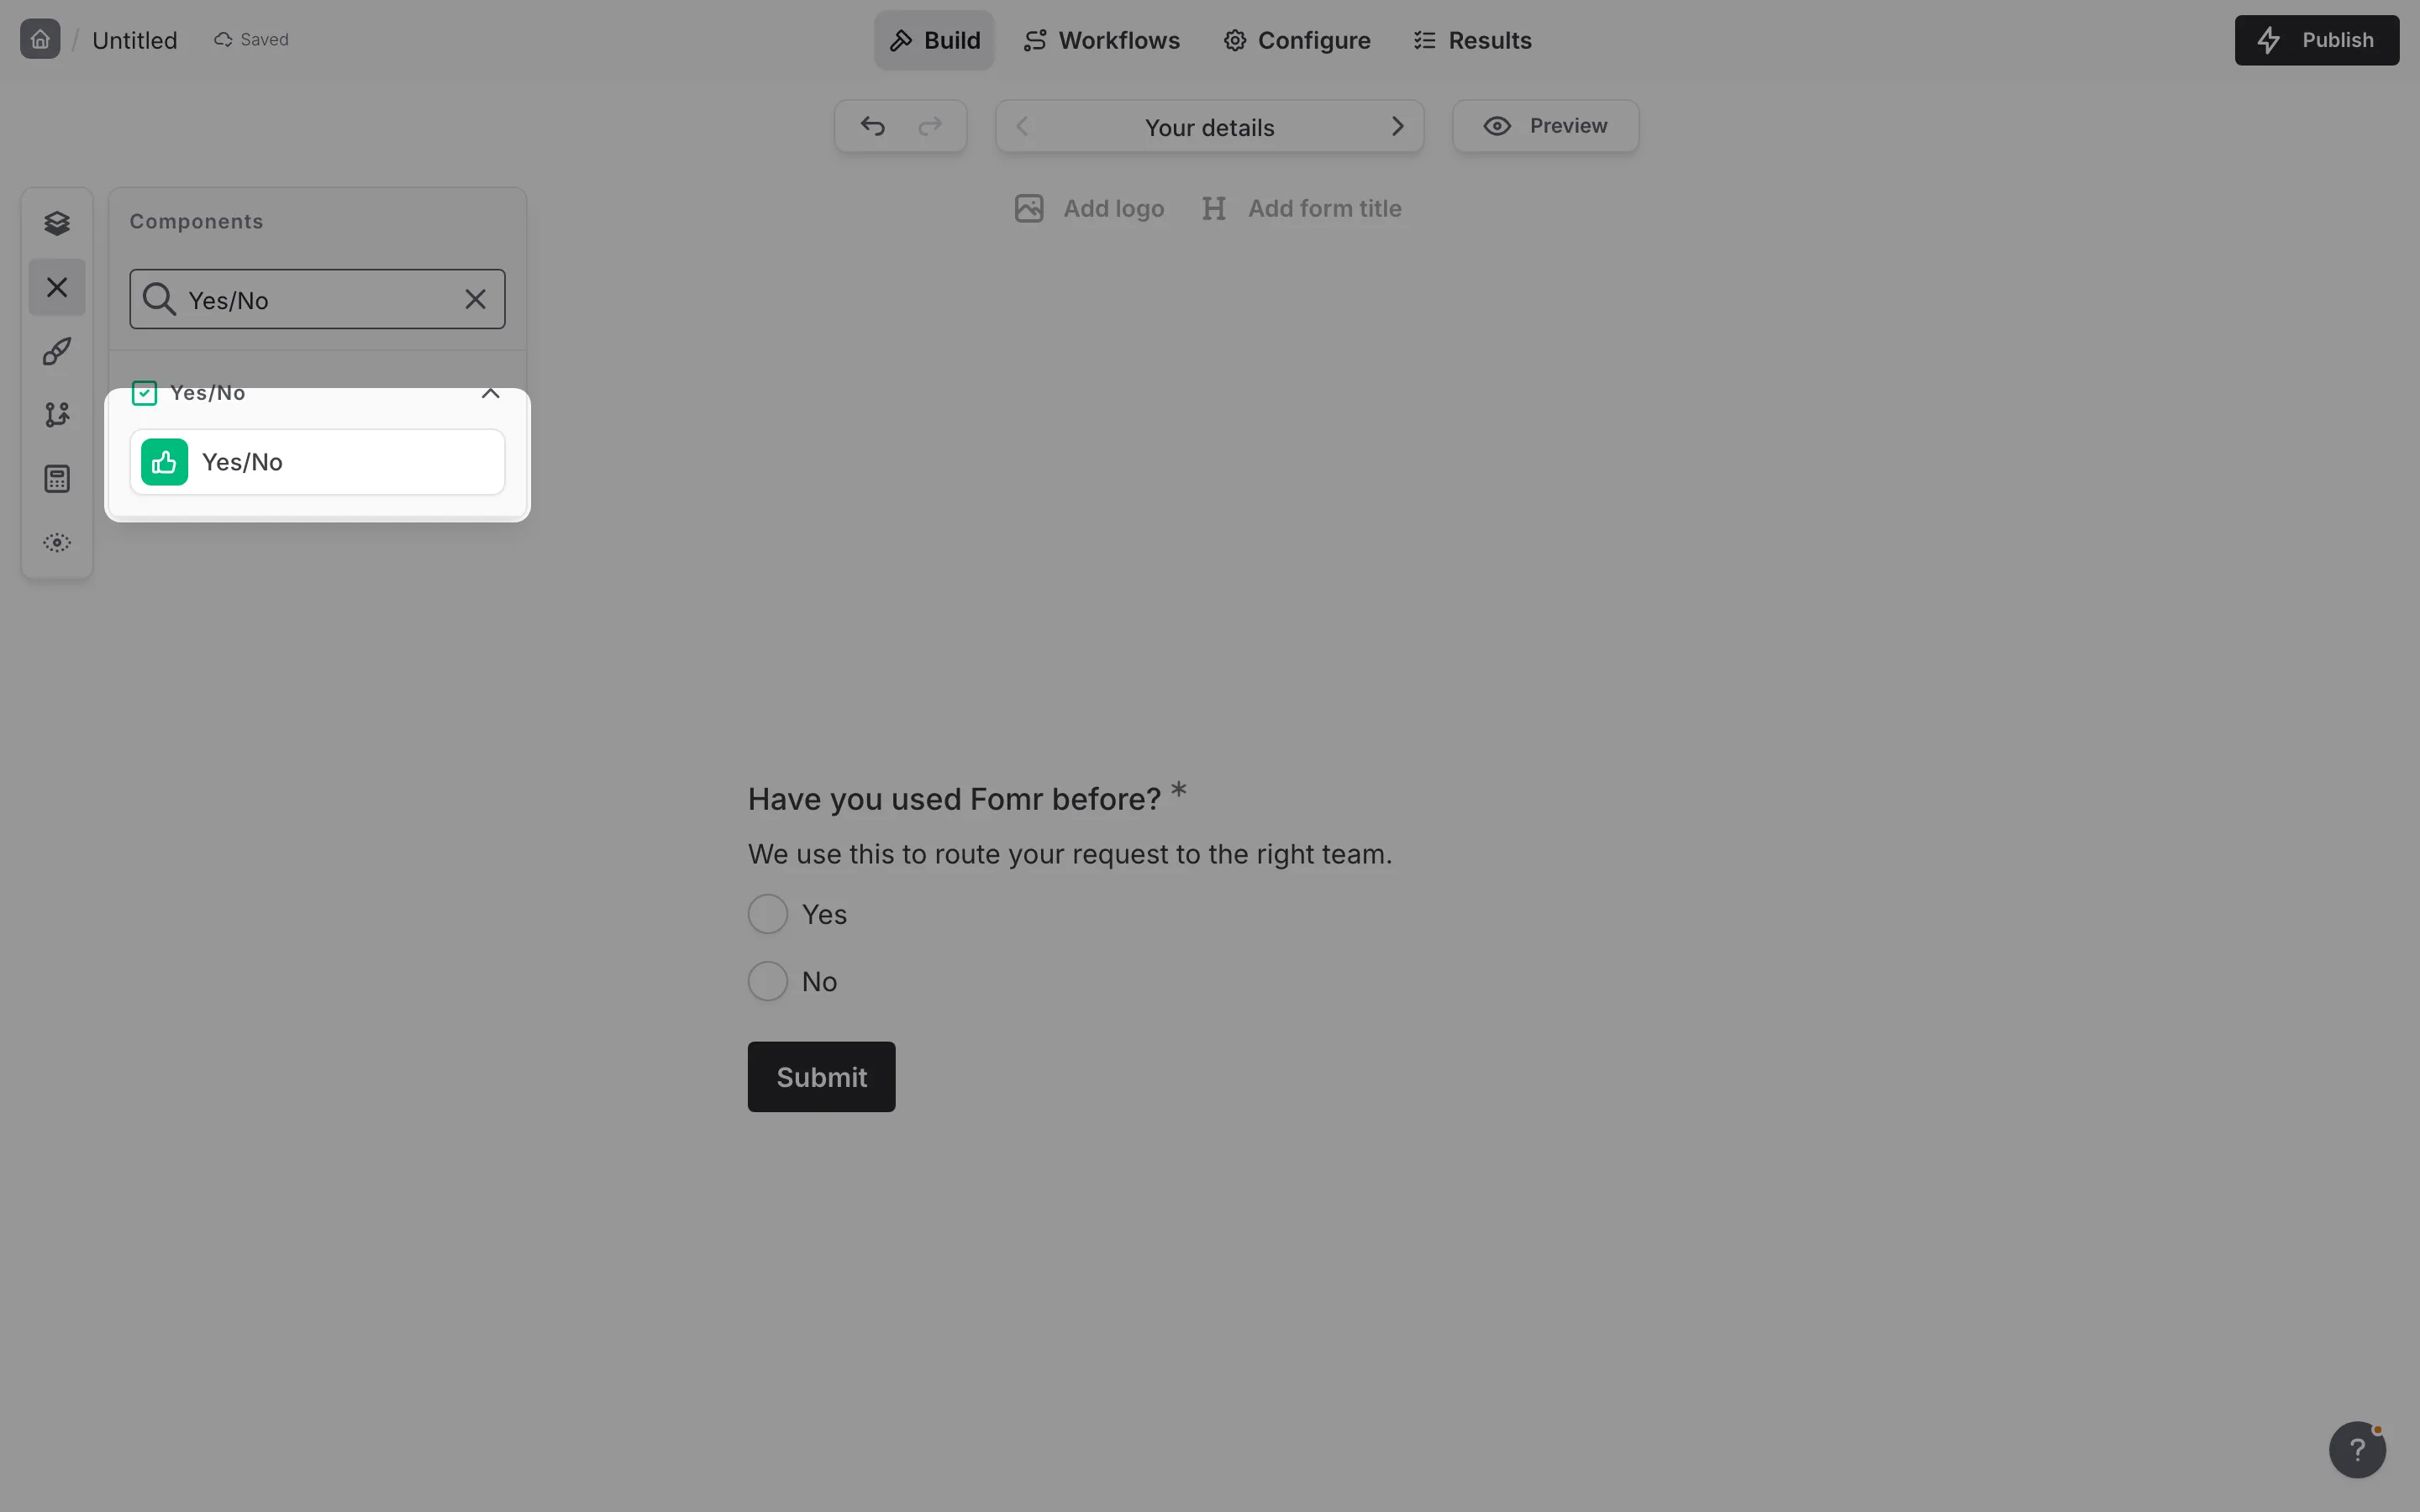
Drag the Yes/No component from the Components panel onto your form
-
Click the component to select it and configure its settings
Configuration options
Section titled “Configuration options”Question label
Section titled “Question label”The question displayed above the two answers.
Tips for effective labels:
- Phrase it as a direct question
- Make sure both answers read as sensible responses
Examples:
- “Have you attended one of our events before?”
- “Would you like to receive a follow-up call?”
Answer labels
Section titled “Answer labels”Every Yes/No question has exactly two answers. The answers themselves are fixed, but their labels are editable directly on the canvas: click an answer label and type to rename it.
Examples:
- “Yes” / “No” (default)
- “Agree” / “Disagree”
- “Absolutely” / “Not really”
You cannot add, remove, or reorder the answers. If you need more than two options, use Multi Choice instead.
Supporting content
Section titled “Supporting content”Add helper text, an example image, or a divider between the question’s title and its input: drag a Text, Image, or Divider component onto the question and drop it on the line that appears under the title. Supporting text comes with full formatting and answer piping. Learn more in Supporting content.
Required
Section titled “Required”Toggle whether an answer must be selected before the form can be submitted.
When enabled:
- An asterisk (*) appears next to the question label
- Respondents must pick one of the two answers to submit
Default value
Section titled “Default value”Prefill the question with Yes or No so respondents can confirm the common answer or change it.
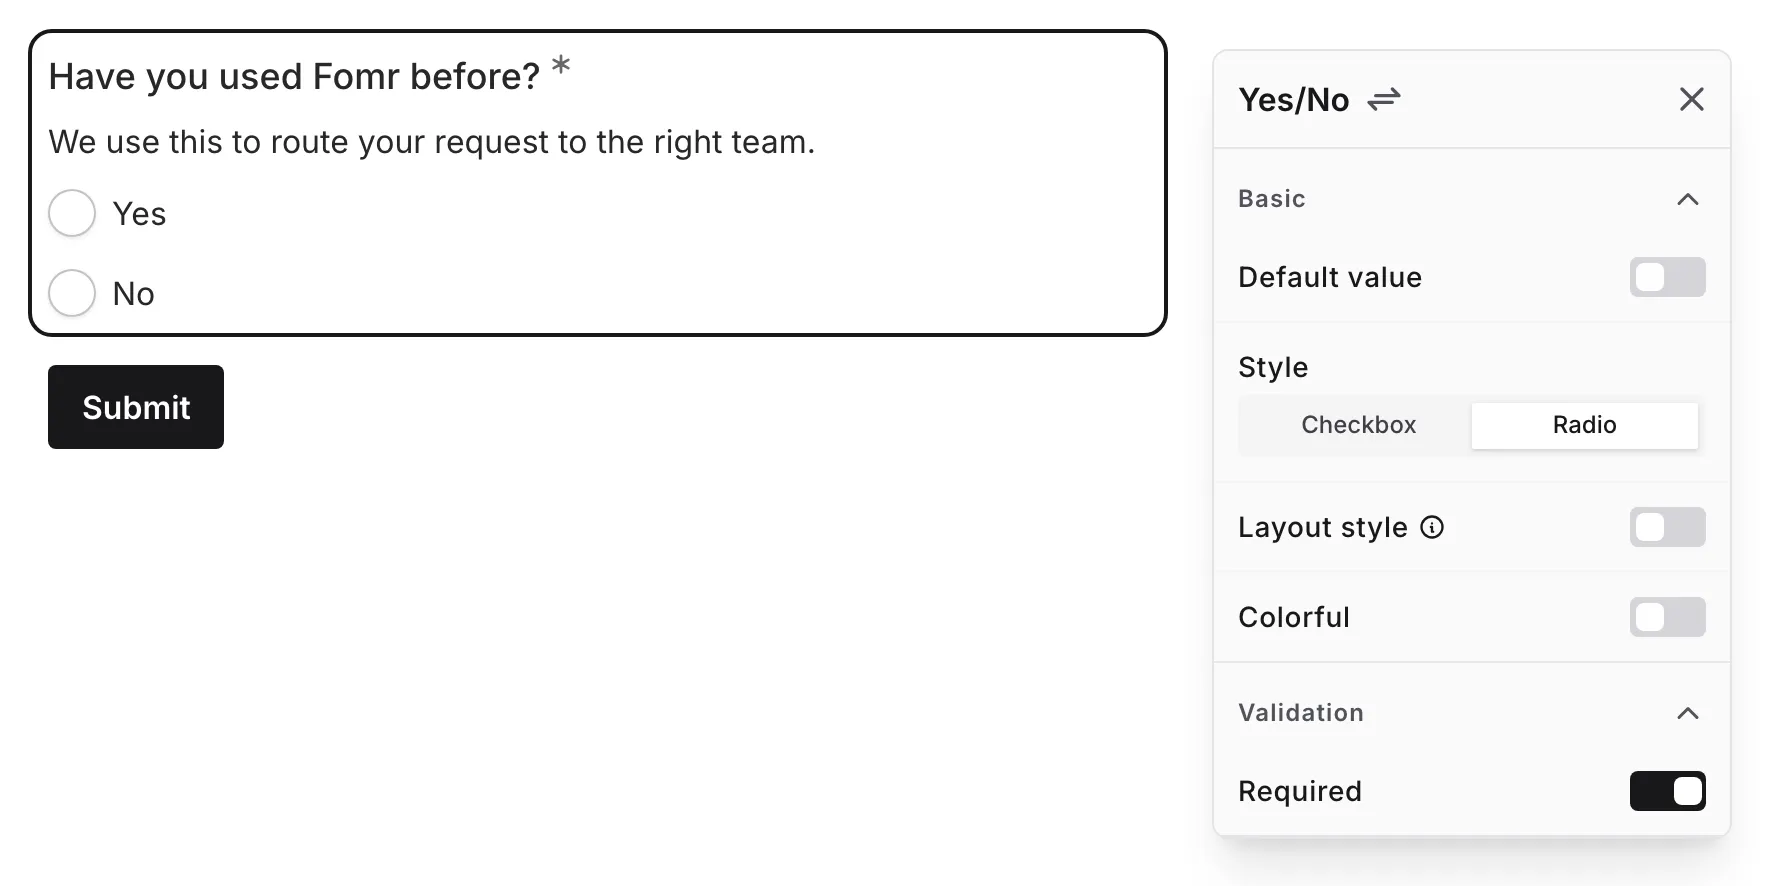
See Default values for how prefilled answers behave.
Choose how the selected answer is indicated: Radio (default) shows a round radio indicator next to each answer, while Checkbox shows a square checkmark box instead.
Layout style
Section titled “Layout style”By default, the question follows the option layout set for the whole form in the Design panel — see Option layout. Turn on Layout style to give this question a layout of its own:
| Layout | Description |
|---|---|
| List | Full-width answers stacked in a vertical list |
| Bordered | Compact outlined answers that hug their text, stacked and left-aligned |
| Inline | Bordered answers placed side by side |
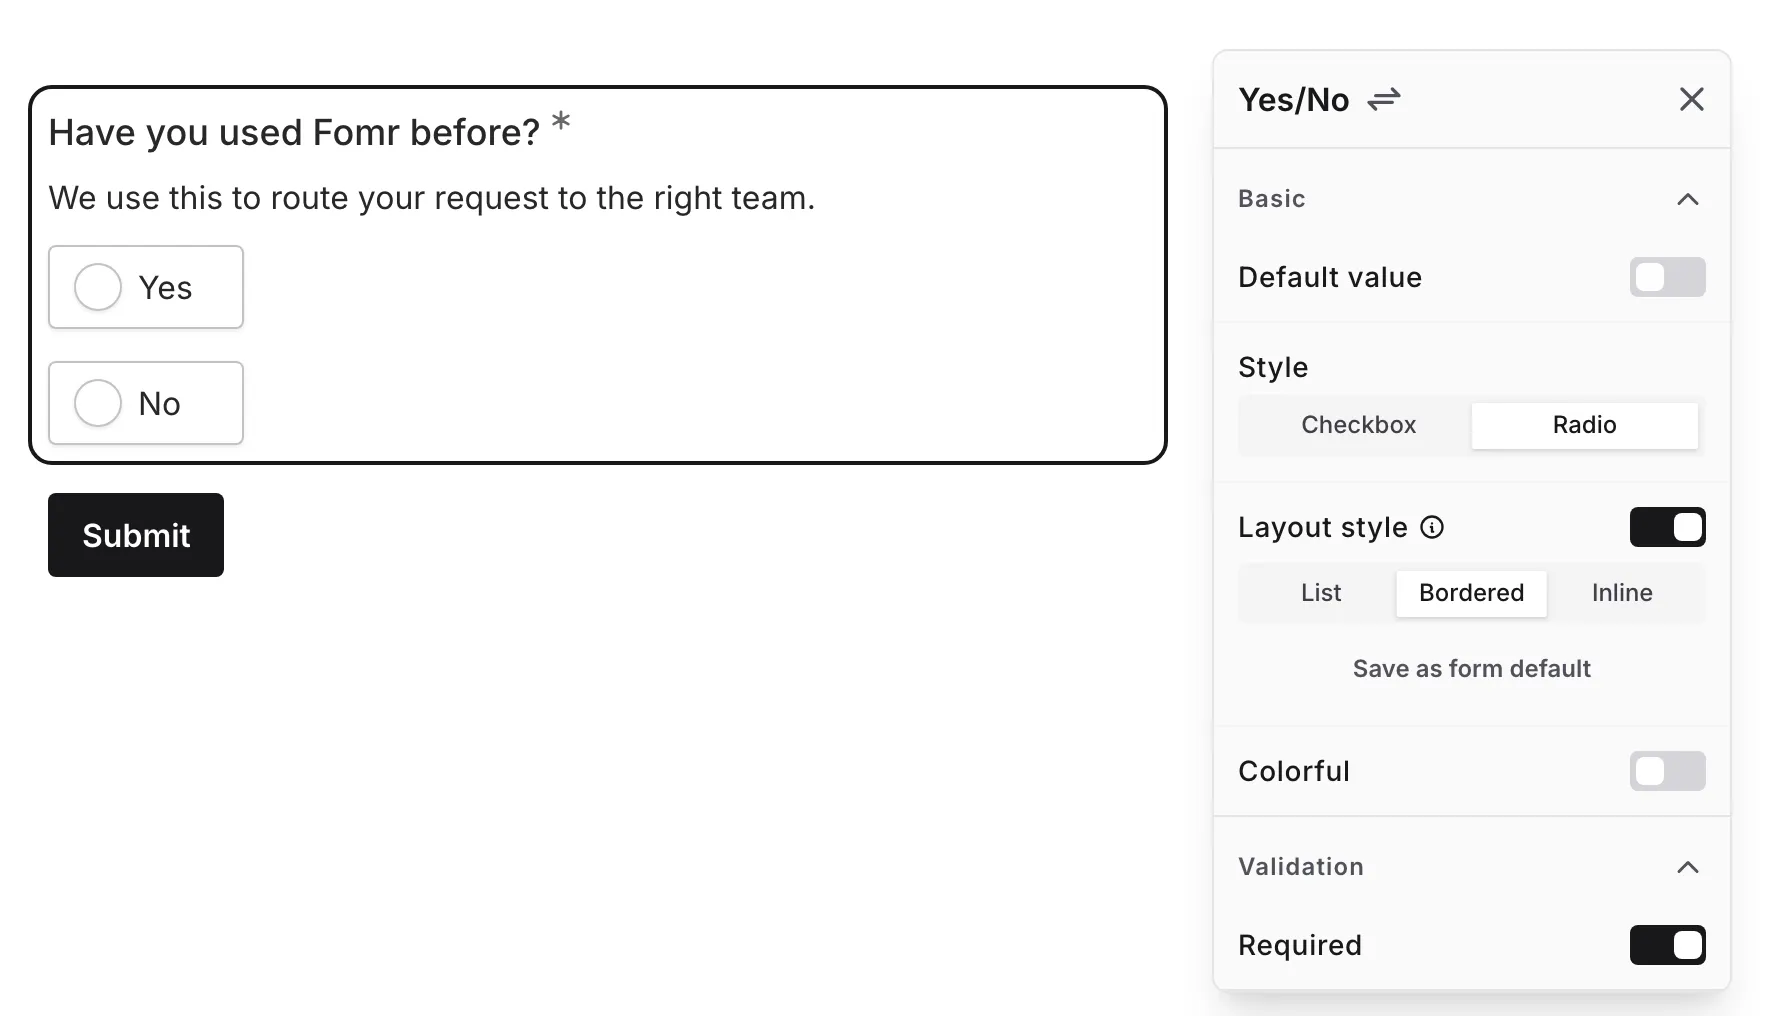
The radio or checkbox indicator from the Style setting appears in every layout.
Save as form default applies this question’s layout to the whole form and turns the override off. Turning Layout style off returns the question to the form’s layout.
Colorful
Section titled “Colorful”Turn on Colorful to give the two answers their own colors. Fomr derives ten distinct hues — the form’s option colors — from the theme’s primary color; a Yes/No question uses the first two, in order, so the first answer always takes the first hue and the second answer the second.
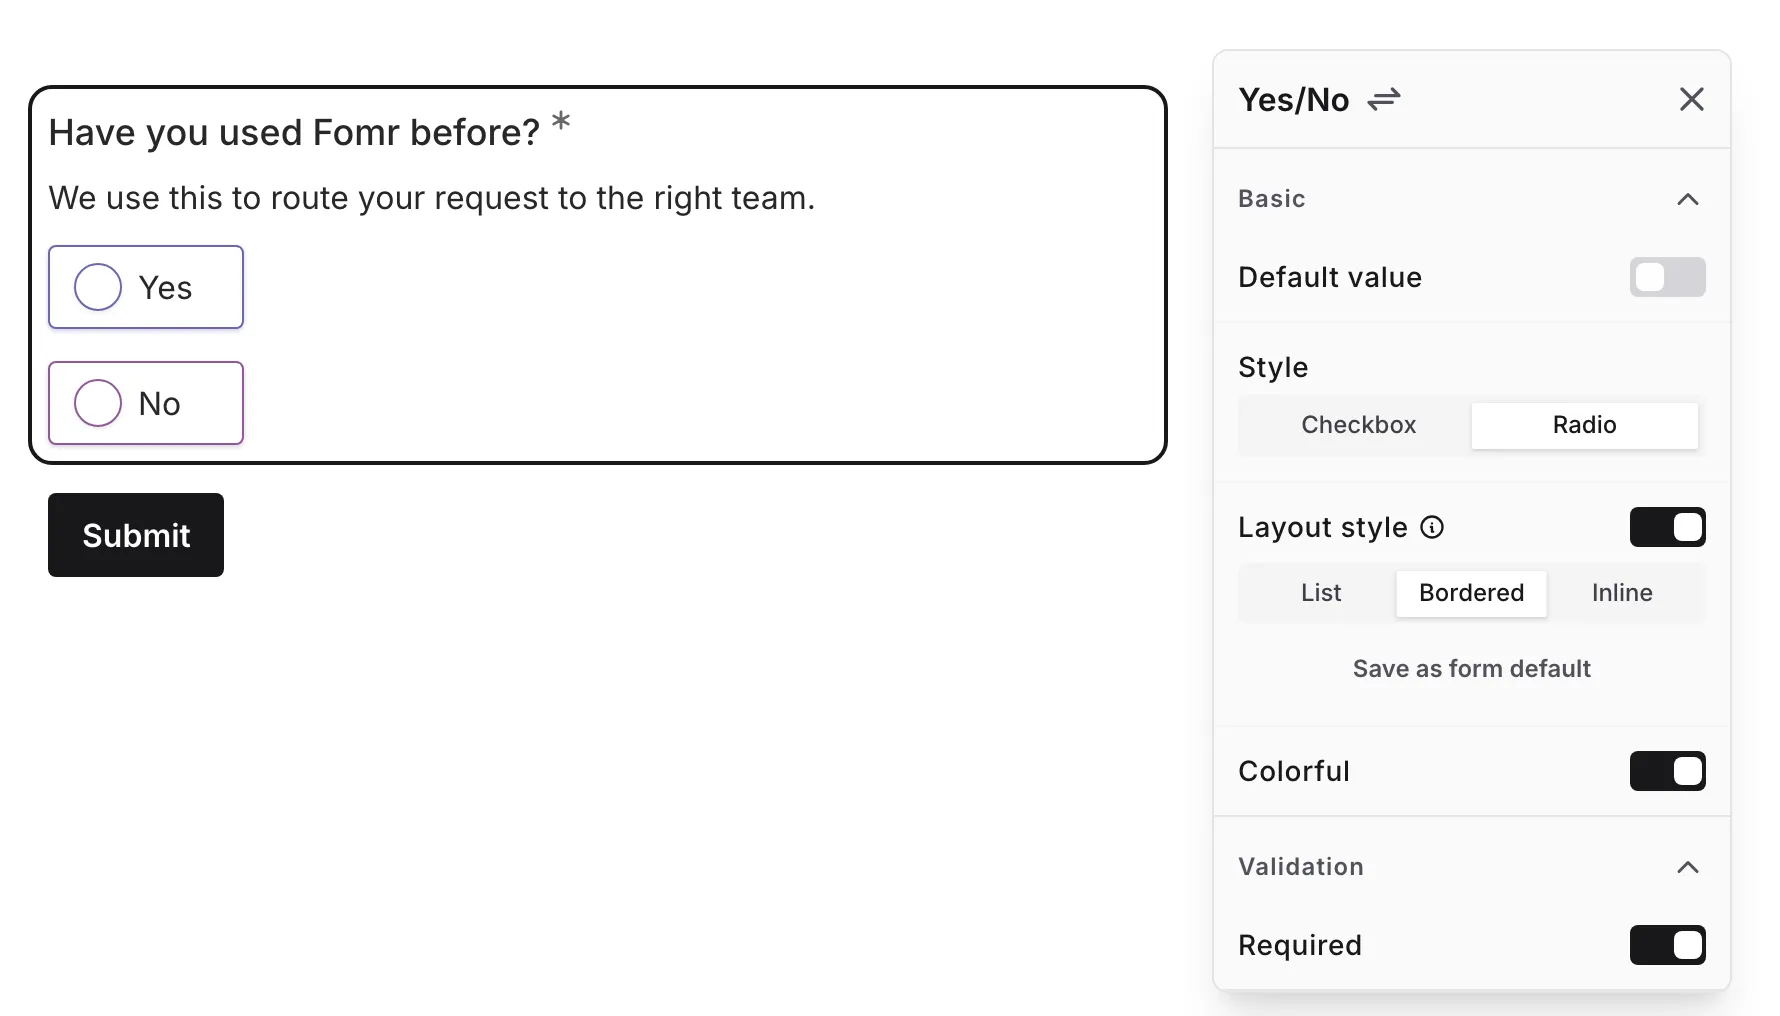
An unselected answer shows its hue on the radio or checkbox indicator from the Style setting, and in the Bordered and Inline layouts on the answer’s outline too. The selected answer fills its indicator with the hue. Changing the theme’s primary color regenerates the hues, so the answers recolor with the rest of the form.
Yes/No vs. Switch vs. Checkbox
Section titled “Yes/No vs. Switch vs. Checkbox”All three components collect binary responses, but each has a distinct job:
| Aspect | Yes/No | Switch | Checkbox |
|---|---|---|---|
| Best for | Binary survey questions | On/off settings | Confirmations and agreements |
| Answers | Two labeled options | On or off | Checked or unchecked |
| Answer labels | Editable | None | None |
| Typical phrasing | ”Do you…?” / “Have you…?" | "Enable…” / “Receive…" | "I agree…” / “I confirm…” |
Use Yes/No when:
- You are asking a question, not offering a setting
- You want custom answer labels
- Respondents should see and compare both answers
Use Switch when:
- The question is a setting or preference
- The choice is about enabling or disabling something
Use Checkbox when:
- Collecting agreement, consent, or acknowledgement
- The pattern is a first-person statement like “I agree…” or “I confirm…”
Handling responses
Section titled “Handling responses”Yes/No responses in your form results:
- Display the selected answer with your custom label
- Keep your custom labels in exports and Google Sheets workflows
- Can be reused in later questions with answer piping
- Allow analysis of the yes/no response distribution